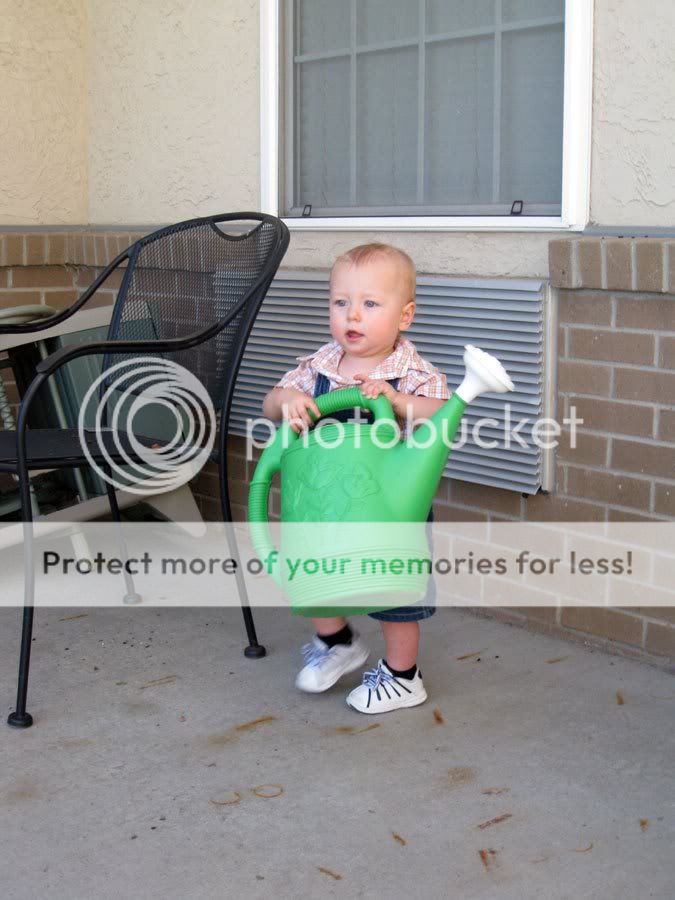
When we were visiting my in-laws over Labor Day weekend, we visited the retirement community. Of course, Theodore was a bit hit. He seemed into the watering can ... so we'll see if he gets his mom's brown-ish thumb or his grandma's black thumb. Or if he goes more along the lines of Uncle Paul or Auntie Karen with a more green color to that thumb.
Showing posts with label gardening. Show all posts
Tuesday, November 8, 2011
Green thumb?
When we were visiting my in-laws over Labor Day weekend, we visited the retirement community. Of course, Theodore was a bit hit. He seemed into the watering can ... so we'll see if he gets his mom's brown-ish thumb or his grandma's black thumb. Or if he goes more along the lines of Uncle Paul or Auntie Karen with a more green color to that thumb.
Thursday, July 28, 2011
Native plants
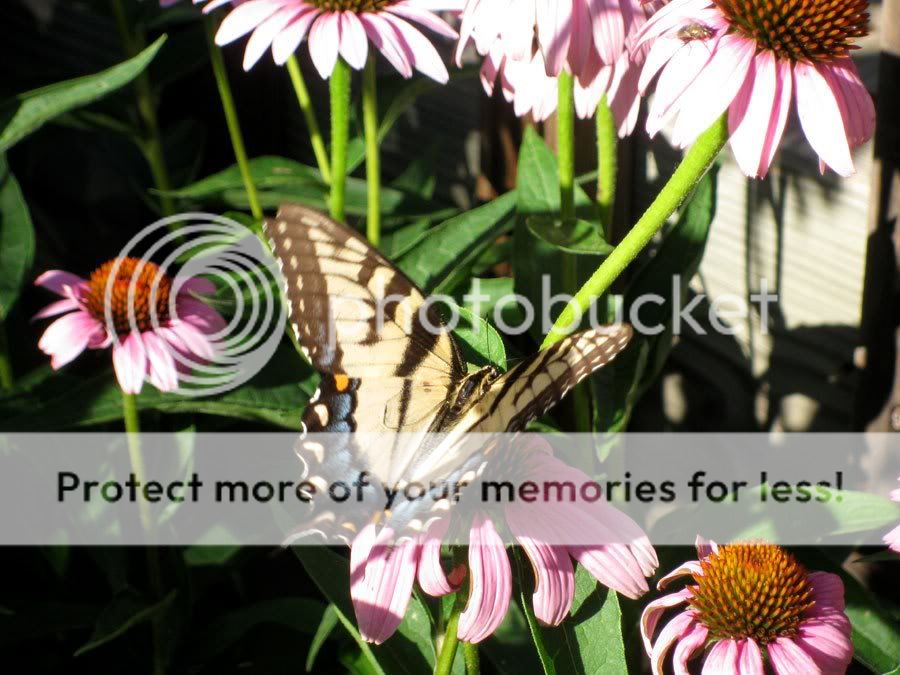
I have no idea what kind of butterfly this guy is, but he's awfully pretty!!!! He hug out for a couple of days.
On a side note, when our nephew was over, I learned that there is a "hard page" version of "The Very Hungry Caterpillar." Who knew?
I'd like to plant more 'butterfly" attracting plants ... but am not sure what direction to go.
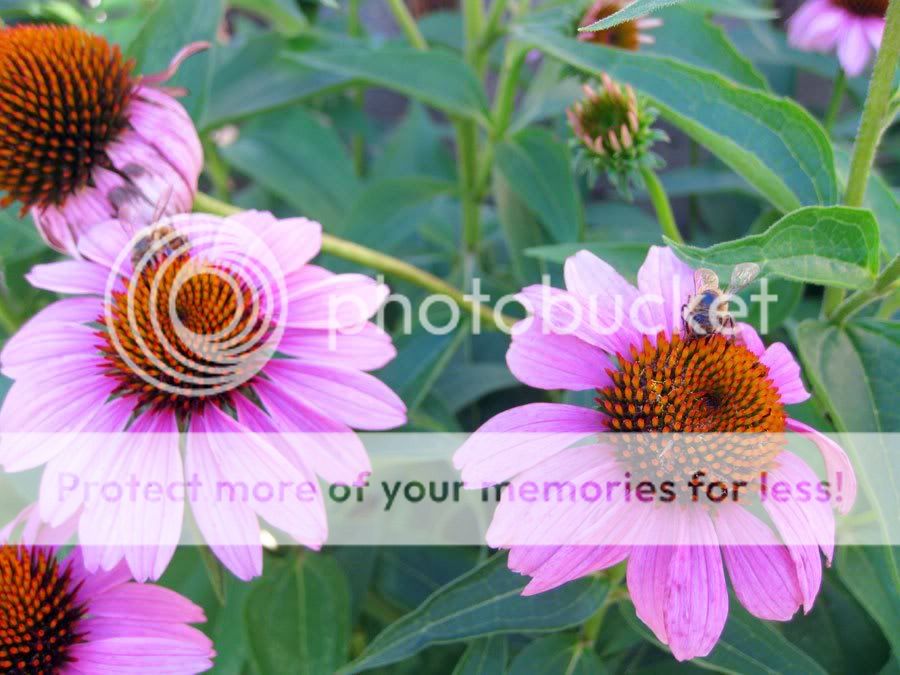
Also spending a lot of quality time with the cone flowers is local bees.
Somewhere I was reading that planting "native" plants to your region is good because it encourages local and natural/native insect activity. It's not really "sexy" to think about the insects, but if things get too out of whack, I guess it's not a good thing.
We've yet to make any BIG planting decisions in our yard ... partly because I would like to use as many native plants as possible (the up side to this is they tend to be more able to handle the heat/minimal water). I just don't know where to start! If anyone has words of wisdom, I'd take them!
There are 2 bees here!
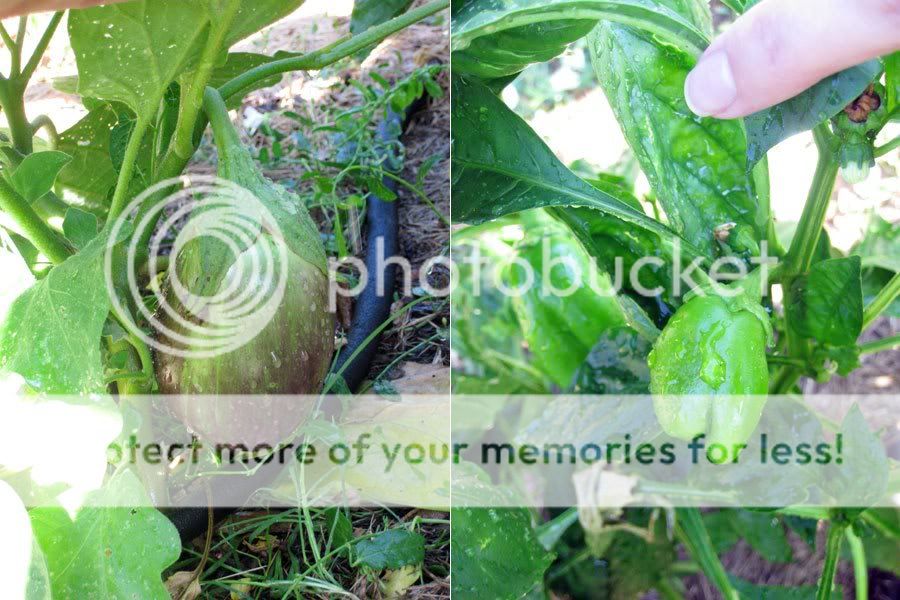
***NOTE: These photos were taken with my little dinky camera ... using teh MACRO (or flower picture) setting. Just a little tip for you our there who want to take close up photos of your flowers or whatnot. I also used the same thing in photographing my eggplants + peppers. They're tiny little guys.
Saturday, July 23, 2011
Garden, 2011, part 3
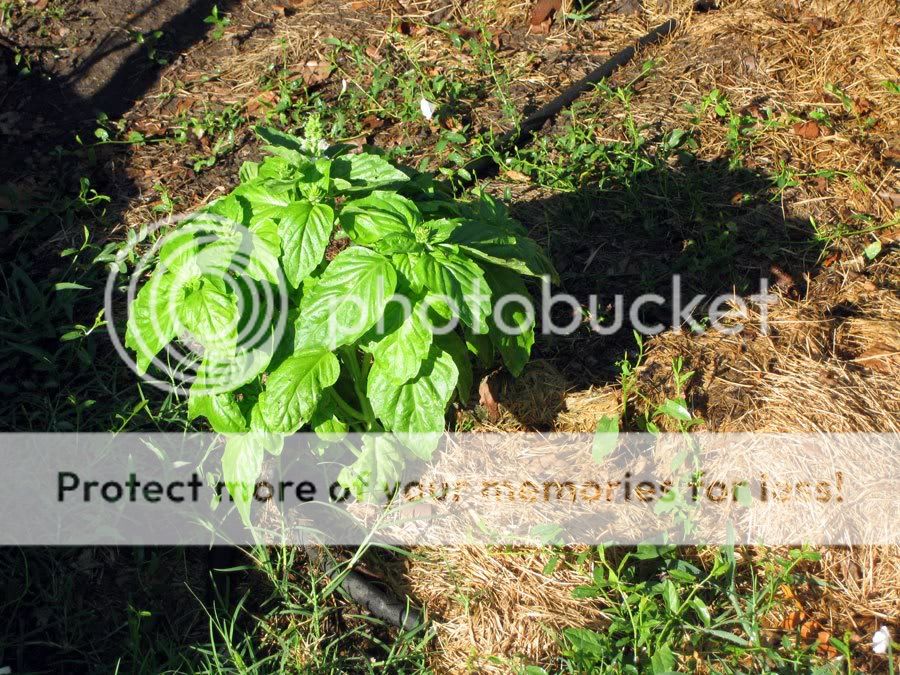
Will you look at what came up? Even though I didn't plant any basil this summer, some found a way up.
Unfortunately, eating it makes me sick, sick, sick ... so I'll have to give it/pesto to someone else.
We gave eggplant a try this year. We've got 4 baby veggies on the plants. We'll see what happens! :) Also looking awesome is the peppers.
Even though I loathe turning on the tap, it's been so awfully hot, I've been watering morning and night, to keep things going.
We also have some tomato varities that are not red, but nothing is turning .... so we're waiting to see what happens with those.
Tuesday, May 10, 2011
Garden, 2011
Ok, no photos with this post b/c there's no action in the garden.
A few pearls of wisdom:
1) Lavender. I think it's nice and I want to grow some. I picked up a packet of seeds and was just outside planting them. And on the back of the packet? It says "flowers will appear second year" ... pft. So much for instant gratification in the garden. I guess this means I'll have lovely greenery, but no lavender smell/color. Grr.
2) The gas company had to dig up our garden in the fall for our neighbor's gas line. Grr. And they dug the hell out of my strawberry patch. My 3-year established strawberry patch that I figured out how to cage. GRRRRRR. I was just in the backyard, praying for a recovery miracle and only have like 5-6 sprigs of strawberry leaves and a big bare area. I am guessing I'll have to get a few more plants, which means plucking flowers the entire first year so they can establish roots and grow big + healthy. GGGGRRRRRRR.
A few pearls of wisdom:
1) Lavender. I think it's nice and I want to grow some. I picked up a packet of seeds and was just outside planting them. And on the back of the packet? It says "flowers will appear second year" ... pft. So much for instant gratification in the garden. I guess this means I'll have lovely greenery, but no lavender smell/color. Grr.
2) The gas company had to dig up our garden in the fall for our neighbor's gas line. Grr. And they dug the hell out of my strawberry patch. My 3-year established strawberry patch that I figured out how to cage. GRRRRRR. I was just in the backyard, praying for a recovery miracle and only have like 5-6 sprigs of strawberry leaves and a big bare area. I am guessing I'll have to get a few more plants, which means plucking flowers the entire first year so they can establish roots and grow big + healthy. GGGGRRRRRRR.
Saturday, March 19, 2011
Garden, 2011 style
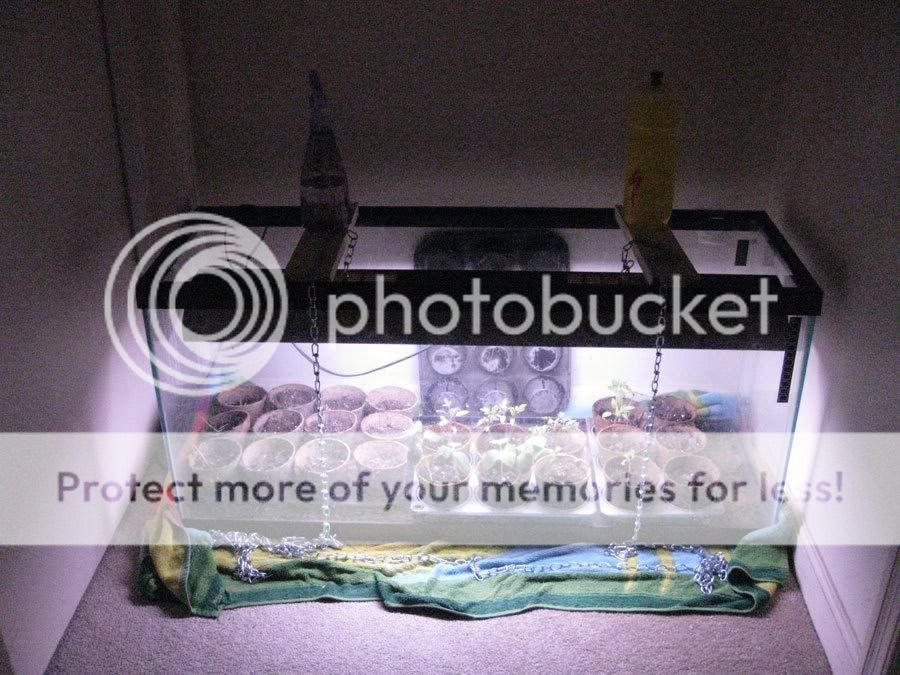
This year, the baby plants are upstairs. I was concerned it was too chilly downstairs.
There's another change, too. I am using old muffin tins to hold the baby plant pots. It's working surprisingly well. When it's time to harden some of them off, I can just take the tin out, and all good! And if I need to twist them to help them grow more straight, same goes. Working like a charm (so far!).
These are cucumbers or melons. We'll see. The packet says cucumbers, but melons grew last year. So we'll see if they were voluntary melons, or if the packet was mislabeled.
I'm attempting to keep track of what is what. Some might work well. Others not. We'll see.
Tuesday, February 8, 2011
Snowblower, old school style
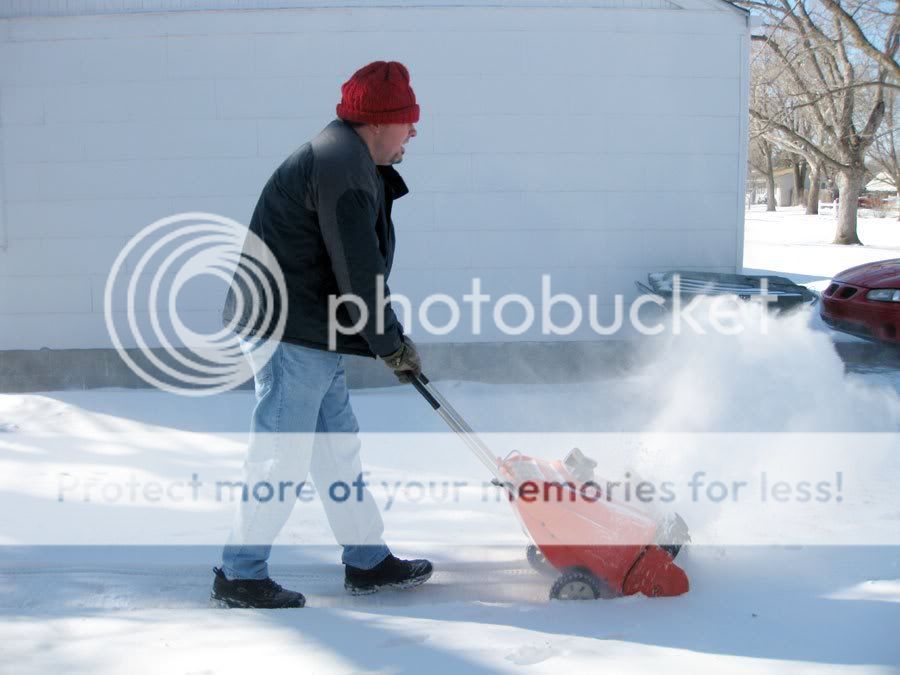
We inherited this snow blower from some friends of Erik's parents. I think the friends moved into a retirement community and had no use for it, so it ended up in our hands.
It hasn't exactly worked, so this summer we took it to the lawnmower place and they waved their magic wand over it. We just had to wait for it to snow. And we waited and waited. Finally it snowed ... and Erik fired it up and went to town! Beats the heck out of the back-breaking work snow shoveling can be. :)
Since we have 3+ inches of snow outside, I almost busted it out this morning, but it's darn loud (and the snow's still coming down), so I guess I'll wait until Erik comes out of hibernation to start clearing the driveway.
In other exciting news, the snow did NOT stop me from using my brand new miter saw this morning. Where there's a will, there's a way. And the saw was a part of starting baby plants for the garden!!!! (yes, snow on the ground and I"m thinking of gardening. I gotta stay warm somehow).
Friday, January 7, 2011
Basil = pesto
Basil on the left, peppers on the right.
BEFORE:
AFTER:
My pesto recipe:
A BUNCH of basil from my garden, washed and patted dry
A few cloves of garlic
Sprinkle of salt
1/2 to 1 cup of almonds, crushed (i put them in a plastic bag and swat them with the rolling pin to smash them)
olive oil
Take all of the ingredients, dump into your food processor. Note, a blender will work, but has to work much harder than a food processor. Blend until smooth. You will probably have to add olive oil as it blends.
An option is to add some parmesan cheese.
You can top pasta with this, and stir in chicken and it's yummy tasty! :)
When we're done with it, if we have extra, I like to put the extra in ice cube trays and freeze it. Then put it into a bag so I can use the ice tray. If I'm in a hurry, I can grab a cube or two or three and use it as an individual serving. Just warm in the microwave. :)
A quick video of why I looooove my food processor! :)
Sunday, October 17, 2010
Strawberry patch
LOOK!!!!! I found this in the garden just last week! I was stunned. Especially since our strawberry patch was mostly flattened this summer.
Shocking.
Now, this could be the last strawberry action in the patch for awhile .... because, well, the utility company had to dig up part of my garden so it could take care of stuff. :( But there are some entertaining photos to come from that.
Tuesday, October 5, 2010
Garden, 2010
Ok, so here's some photos from MUCH earlier this summer. Before we didn't get any rain.

Overall.

Closeup of a pepper (question to you photo people .... what setting did I use for this? I've given it as a tip before!).

The tomatoes look pretty good. I had some heirloom plants, and they're really tasty. I got a 'mixed' seed packet, and there were no wild-colored tomatoes. Oh well, maybe next year!


Erik's proud of his mater crop this year.

This was our "cucumber" plant that turned out to be a melon plant. Oops. Happy accident, but I think I'll give this another go next year.
Overall.
Closeup of a pepper (question to you photo people .... what setting did I use for this? I've given it as a tip before!).
The tomatoes look pretty good. I had some heirloom plants, and they're really tasty. I got a 'mixed' seed packet, and there were no wild-colored tomatoes. Oh well, maybe next year!
Erik's proud of his mater crop this year.
This was our "cucumber" plant that turned out to be a melon plant. Oops. Happy accident, but I think I'll give this another go next year.
Sunday, July 4, 2010
Strawberry patch update
Overall, it's been a successful year for strawberries at our house! Just look at our beauties! :)
Plenty of ripe berries.
And baby berries, too!
The most difficult thing is you have to keep picking them .... every day. It's not like tomatoes where you'll get 3 one day and then wait a few days before getting more.
Plus, weeds overtook my garden for about 3 weeks, so I'm just getting to where I can see everything, strawberries included!
Also a strong start for the zucchini. They're big and beautiful now, and we're waiting on them to start producing ... because we can't wait to grill 'em up!
Oh, how I love thee, homegrown strawberries!
Monday, May 17, 2010
Rain Barrels, 2010 style!
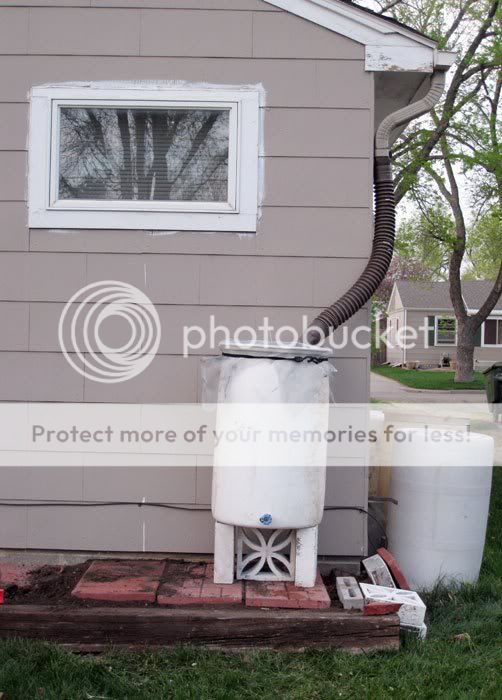
I'm not 100% done. Heck, I'm not even 25% done, but here's where we're going in 2010 with our water harvesting.
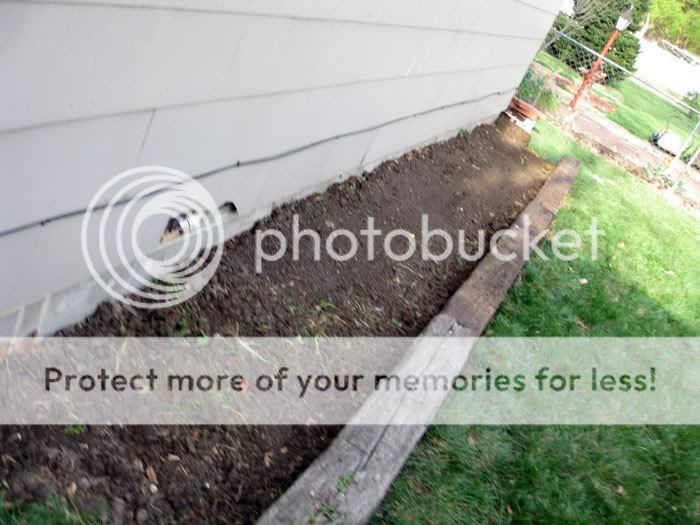
This is the back of our house.
We added some railroad ties. And the space in between, I have dirt removed during the patio project last summer. I'll put it in there and then rain barrels will go on top!
Sort of like this.
I have only one done, but all of the rain revealed a flaws in my efforts, so I will have to empty it and then do a bit of tweaking, but this is where we're headed this summer!
I hope to have more time this week to work on it. In between all of the rain we're getting. Seriously! I wish I had this all done so I could just harvest the water! Geek, I know!
Sunday, May 16, 2010
Safe strawberries?
Let's recap: Evil birds ate my strawberries last year. This year, I have sworn an oath to protect them, and built protection. All is right in the world.
Until you look a little closer.
A few weeks after building my strawberry cage, I was in the backyard. And I looked. And did a double take. And then had to look a little closer.
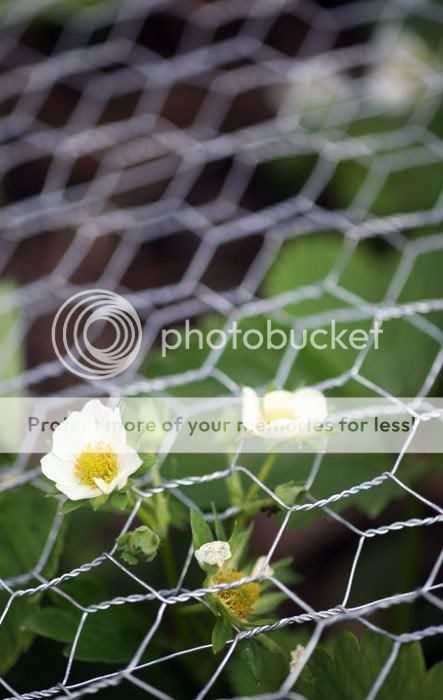
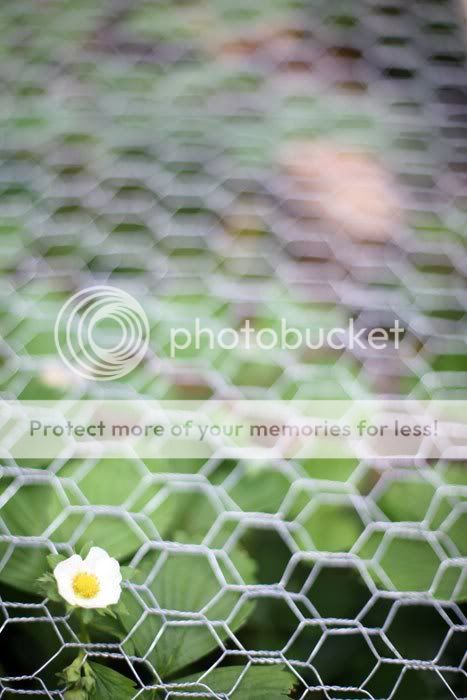
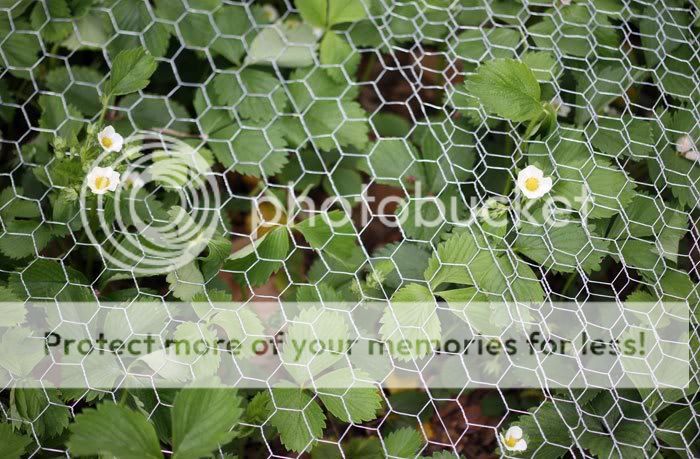
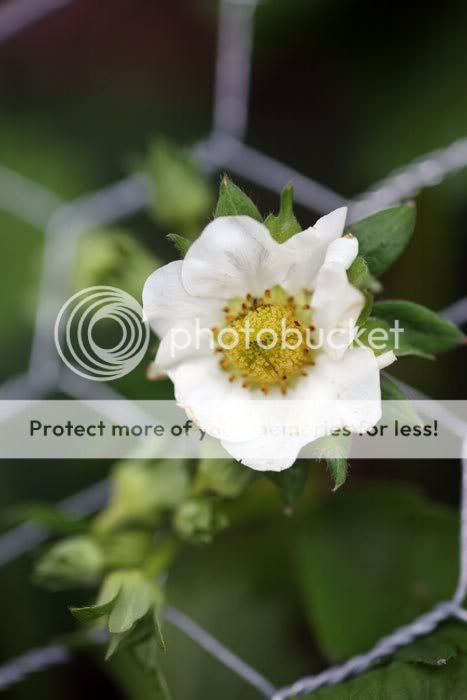
Strawberry blossoms were growing UP THROUGH the chicken wire protection.
NO BABIES!!! TURN AROUND, BE SAFE FROM THE BIRDS OF THE AIR!!!!
Alas, I feel like the scientist in Jurassic Park: Nature found a way.
So it looks like I'll have to cover (at least portions) of my strawberry patch/cage with screen. *sigh*
Any other ideas? Maybe I should get more RR ties and stack them 2 high around the patch, that way they can grow as tall as they want, and I would just put the chicken wire barrier on top of the 2nd RR tie?
Saturday, May 15, 2010
Saving the strawberries
Two years ago when Erik and I started our gardening venture, we (ahem, I) planted strawberries. I'd read up on them quite a bit, and knew the first year, I had to pinch the flowers and let the roots establish. SO, no harvest during year 1. You can imagine how excited I was last year to have a strawberry harvest.
Things looked so promising HERE. Yet, that strawberry you see is the only one we picked out of the garden. Why? THE BIRDS. :( DARN YOU, BIRDS!!!!!!!!
This year, I am going to fight those pesky buggards.
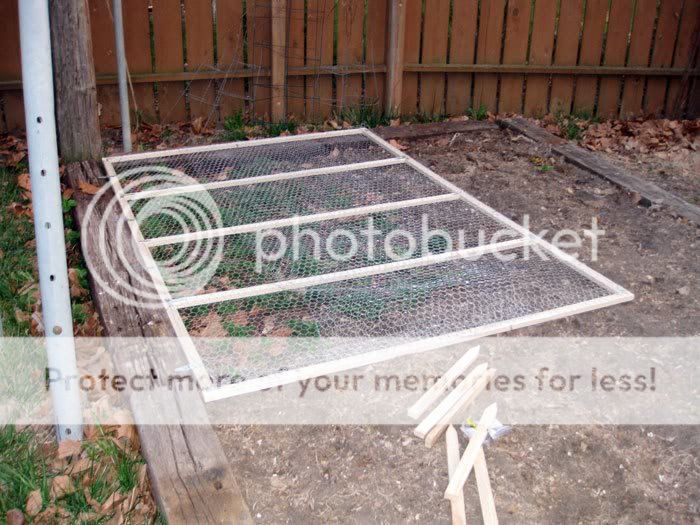
Which brings me to my strawberry cage.

The garden before anything is added.

The beginning of my plan.

I had to acquire a new tool, staple gun, for the task. I was excited to get a new tool, but not excited to get blisters from using it. Chicken wire is NOT fun to roll out. It's pokey.

TA-DA!!!!!

I decided hinges would be nice so I could more easily access things.

SAFE AT LAST!!!!!!!!!!!!
Or so I thought .... I did this about a month ago, and have been delayed in posting. Stay tuned for what happened next ...
Things looked so promising HERE. Yet, that strawberry you see is the only one we picked out of the garden. Why? THE BIRDS. :( DARN YOU, BIRDS!!!!!!!!
This year, I am going to fight those pesky buggards.
Which brings me to my strawberry cage.
The garden before anything is added.
The beginning of my plan.
I had to acquire a new tool, staple gun, for the task. I was excited to get a new tool, but not excited to get blisters from using it. Chicken wire is NOT fun to roll out. It's pokey.
TA-DA!!!!!
I decided hinges would be nice so I could more easily access things.
SAFE AT LAST!!!!!!!!!!!!
Or so I thought .... I did this about a month ago, and have been delayed in posting. Stay tuned for what happened next ...
Tuesday, April 6, 2010
Baby veggie plants!
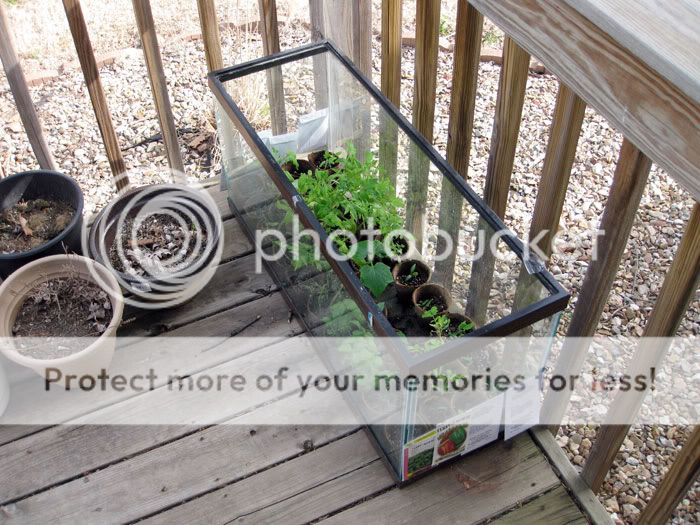
Sunday, the baby plants were outside! Actually, they were eventually moved into the front yard to take better advantage of the sun, but you get the idea ...
I gave them in rows, with labels on the end so I know what is what.
A little better view of the plants.
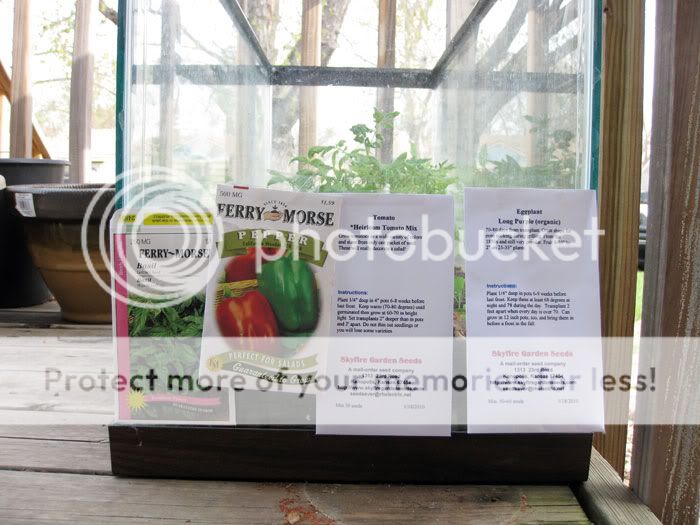
We have a variety of heirloom tomatoes in there, also peppers, eggplants, cucumber, basil ... and I think that's it. But I could be wrong!
Earlier this spring, I put a few plants outside, but the wind TOTALLY kicked them down. Killed a few, so I think putting them in the aquarium outside gives them exposure to the elements, but protection from the crazy wind we're having around here.
Monday, February 8, 2010
For growing plants from seed ...
PSA to those who grow their garden plants from seed: I was talking with someone from the local nursery today ... and she suggested to have a fan blow on them. Just a little one.
I've been in a greenhouse before, and there were fans. I wondered what they were for.
Anyhow, the woman said they are to help prevent fungus or mold from growing on baby plants. :) So Michelle, this post is for YOU! :)
I've been in a greenhouse before, and there were fans. I wondered what they were for.
Anyhow, the woman said they are to help prevent fungus or mold from growing on baby plants. :) So Michelle, this post is for YOU! :)
Sunday, January 31, 2010
Gardening 101 (Basil is up!)
Look ... baby basil in my basement! I also have one little container of heirloom tomatoes poking their little heads up, too.
YIPPIE!!!!!!!
I figured I'd use this as a springboard to talk about gardening. A friend of mine asked for some advice about gardening. I know some of our regular blog readers are gardeners (holla to Jackie and Michelle!), but others might need a little inspiration to start. So here we go. I'm going to work in tiers, from the easiest to the more advanced. Just START WHERE YOU'RE AT!!!! Gardening is all about baby steps. And long-term investment.
1. Container gardening
Let me first say that Erik excels at this type of gardening. And my mom is getting pretty good at it, too.
It's pretty simple, actually! To get started, you'll need some pots. The bigger, the better! If they're a foot or less deep, just fill 'em with soil (side note, my farmer friends tell me dirt is the stuff that is stuck under your fingernails, and soil is what the ground is made of). SO get soil (not dirt). It could be potting soil or stuff from your own yard. Whatever.
If your pots are larger, you might want to start off with a layer of rocks at the bottom. A few inches deep. Then fill the rest with soil. Rocks help to let water drain. If you want to sprinkle some in the less deep pots, you can, but be sure there is plenty of soil in there.
Ok, now that your pot is filled, put a few plants in it! It's THAT simple!
Container gardens work well if you are living in an apartment and have a small patio or deck, but no yard. Or if you want to ease into gardening slowly. :)
Some suggestions for container gardening:
• TOMATOES! You WILL want to get a little cage for them so they'll grow up the funnel and have some support, though.
• Also, I think peppers would work well.
• I grow a plethora of herbs in mid-sized pots on the front porch. Oregano, chives, mint. Some herbs (like mint) will go crazy and start to take over your yard, so it's good to contain them in a pot.
• This year, I'm going to try growing decorative gourds in a large pot. Well, more about that when I actually do it. But I think these would work well in a BIG container because they simply spread out and overtook the garden last summer. This should help me keep them at bay. And a special note, the decorative gourds come in a seed packet. But they're EASY to grow. Especially if you have kids, they're awesome! The leaves are really big and the gourds come in all shapes and sizes ... totally fun for kids!
• If anyone else has a good suggestion about what to put in a container garden, leave a comment!
Oh, and HERE is a post about Erik's foray into container gardening.
Also, HERE is another great idea and a space saver! :)
2. Just sick 'em in the ground.
Up until last summer, this is what my mom did. She'd get tomato plants near the end of the season and plant them right next to the air conditioner. Why, you ask? So the AC drain hose would water them. :)
There was really no ground prep or weeding or any concern of that sort. VERY low key.
If you're not anal retentive like I am, and don't mind gobs of weeds or other grass in with your plants, this is a good way to go.
Tomatoes are pretty hardy and survive this well. I would NOT recommend it for smaller plants, like Basil or herbs. Especially NOT mint. This is an open invite for mint to take over your yard.
3. A "traditional" garden.
This is what most people probably think of when they think "garden." There is a separate part of the yard that you designate as your "garden." If you have an area that you think has already been a garden, it might be easier. But let's just pretend you don't have a garden and want to start one.
• First, you'll want to consider how much light the parts of your yard get. Some plants do well in the shade, but many (tomatoes!) need sunlight to do their thing. So you want to select an area of the yard that gets ample sunlight. Now, you don't have to sit in a lawn chair and watch your backyard all day, just stick your nose out in the morning, at noon, and afternoon to see what is in sun and what is in shade. I'd suggest selecting a sunny spot!
• Next, you'll need to prepare the ground. Decide how large you want your garden to be. If you are not sure, I suggest starting small. Erik and I started small the first year. Roughly 7 feet by 7 feet. It was enough for tomatoes, basil and to start our strawberry patch. I selected an area that was small at first, but had the potential to expand if/when I was ready.
• Now, you don't HAVE to do this next step, but it would be a good suggestion to consider. I would recommend finding out if you have a K-State Research & Extension office in your area. The Extension office does SOIL SAMPLE TESTING! (Mike, I KNOW you're totally rolling your eyes right now). I actually had this done at the end of the 2009 growing season, and it was pretty valuable. I know I have good organic compound (3.1%, the goal is 5%), but do NOT need to add any more manure to the garden. Good to know! I'd search the phone book for "county extension" and then give them a call and ask if they do soil sample testing. I think mine ran in the $7 to $12 range. I had to dig down 6 inches in about 6-8 different areas of the garden and take the soil, then mix it all together.
Having a soil test done will tell you right from the start what you're dealing with. If you should add more organic matter, or if you are lacking in any nutrients.
Ok, so you don't HAVE to have a soil sample, it's just a suggestion.
• So, you have the area you want to make into a garden. I would next mark it off. You can do this with stakes and string, or just get out some spray paint. :)
• You'll next want to prepare the ground. I borrowed a tiller from a friend. Then a few weeks later I totally got a steal on our VERY OWN garden tiller. But YOU DO NOT HAVE TO PURCHASE ONE!!!!! If your garden is pretty small, you can just dig it up. If it's larger, say 4x4 or bigger, I'd suggest a tiller. Maybe talk with the neighbors. Does anyone have one you could borrow? Or, many hardware stores have equipment for rent. From 1 to 3 hours. And the rates are pretty darn reasonable.
When preparing the ground, you'll want to get the soil broken up and get rid of the grass (if there is any present). When I first broke ground on our garden, we (ok, Coop did all of the hard work) ran the tiller over it several times, then picked out the big clumps of grass, then raked out the smaller sections. Then Coop tilled again.
I think I also put some peat into the garden when we broke ground. Just to get some more organic-ish stuff going on in there. We tilled that in.
• Next, you'll need to figure out what you want to plant. And if you have the SPACE to plant it. For example, in our first 7x7 garden, there really wasn't a lot of room for cucumbers or zucchini to grow around the ground. And the squash plants were HUGE! They were monster space eaters! (OR you might first think about what you want to plant, then make a space big enough for it!).
• If you're just starting out, I'd suggest going to a nursery and getting baby plants from there. Tomato, cucumber, pepper, basil are all good starters. But beware of cucumbers, they can be space eaters! I'd get plants that have been started already, because they have a good head start. If you're awesome and want to start a few things from seed, corn and squash and zucchini all grow well from seed. But if you grow corn/sweet corn, you might have to contend with coons, which is why I've never planted it.
I honestly think the key to planting a garden is to look at what you eat — or like to eat, then consider planting those sorts of things. For example, the last 2 years, I've planted beans. Honestly, we just don't eat them. And there were never enough ripe beans at one time TO eat. So I'm not putting them in this year.
• Plant it, water regularly (or for the KC people, they get ample rain, and their tomatoes grow more quickly than mine, ahem, Vern), and enjoy!
• Ongoing care: with this option, you might want to weed the garden occasionally. The first two years, I had stones surrounding the garden:
(tomatoes in the front, the big leafy thing is zucchini, peppers and beans in the back, along with some basil in there somewhere ... and strawberries crawling on the ground).
My struggle was that weeds would creep in through the cracks in the stones. I'll post more about this year's possible solution to it. I'm just sayin' if your garden is "in" the yard, you might want to think about a barrier of some sort.
• Lastly, I'm going to talk about ground covering. Once your plants get rockin' I'd suggest mulch of some sort. But DO NOT run to the store and get mulch. Just use grass clippings to cover the ground. It does several things. 1) helps prevent weeds from poking through. 2) helps to retain water if/when it rains, or when you water.
• Oh, one last-last tip. This is more of a pet peeve from when I lived in Hays. People, PLEASE water your gardens in the MORNING. DO NOT water in the afternoon. The water will just evaporate more quickly and be less effective. On watering, you don't have to water every day. Every couple of days (3 times a week-ish) should do fine.
4. Plants from seed. (This is for crazy people like me.)
Our garden started to get large, and filling it with plants from the nursery became expensive. So I have started to purchase seed packs, and in mid-to-late-January, start them in my former aquarium. This is NOT for everyone, and takes more TLC on these little guys than most people are willing to give. I'm just saying this IS an option for gardening. But it's a bit more advanced. If after a few years, you have a great grasp on gardening, give this a try!
ALRIGHTLY.
That's a TON of info ... I hope it's been a tiny bit helpful. I also want to talk about composting, but will do so in another post. And also RAIN BARRELS. But again, will do that in a different post. Both of these things are sort of supplemental to gardening. Composting is SO easy, and there are some REAL benefits to doing it! And it involves little to NO skill. :) Rain barrels, however, involve more skill and time.
Oh, I'm growing baby tomatoes, eggplant, basil and such. I always plant more than I need, in case not everything grows, but there is a GOOD chance I'll have some extra heirloom tomato plants. So if you're in the Salina or Wichita area and want some of my extra plants, DO be sure to let me know, and when spring is here, I'll be happy to share my extras. :)
Thursday, January 21, 2010
Heirloom veggie seeds are HEEEEERE!!!! :)
YEEE-HAAAW!!!!!!!
Check out what came in the mail today:

*grin*
Next up, plant these puppies:

I started a few tomato seeds last week ... but now the big guns are here!

Let's talk about heirloom veggies. Last summer, I read in Better Homes & Gardens about heirloom tomatoes. The gist of the story was that the tomatoes are supposed to be more flavorful. :) They also come in cool colors (like purple ... have YOU ever seen a purple tomato?).
I'm SO ready for this summer and to get my fingers into the garden!

And this was what I found on the bottom of my invoice:

I feel all the better for supporting a company that utilizes sustainable practices. The place they get the seed envelopes from uses wind power to make the paper. How cool is that??!!??!
Oh, and if you want the hookup on these seeds, CLICK HERE to check out their online catalogue.
Check out what came in the mail today:
*grin*
Next up, plant these puppies:
I started a few tomato seeds last week ... but now the big guns are here!
Let's talk about heirloom veggies. Last summer, I read in Better Homes & Gardens about heirloom tomatoes. The gist of the story was that the tomatoes are supposed to be more flavorful. :) They also come in cool colors (like purple ... have YOU ever seen a purple tomato?).
I'm SO ready for this summer and to get my fingers into the garden!
And this was what I found on the bottom of my invoice:
I feel all the better for supporting a company that utilizes sustainable practices. The place they get the seed envelopes from uses wind power to make the paper. How cool is that??!!??!
Oh, and if you want the hookup on these seeds, CLICK HERE to check out their online catalogue.
Subscribe to:
Posts (Atom)