Showing posts with label photo tips. Show all posts

Tuesday, January 24, 2012

Colorado, 2011 — Part 2


We went down the mountain a bit. I'm not sure where we were, but it was beautiful.


Pretty, pretty, pretty.


Don't ask.


Seriously.


Really nice walking path.


Beautiful.


And guess WHO was crawling in the bushes, taking photos? NOT ME!


PHOTO TIP: Switch your camera to a manual setting and FORCe the flash. With the baseball caps on, out faces would have been in shadow otherwise.


You can see a bit of the flash in mom's sunglasses (2nd from right). But don't we look well exposed?

Sunday, January 22, 2012

Photo tip #5


This was taken with my point and shoot (purse) camera in the country. The sun had set, but I liked the tree/silhouette.

I pulled out my camera and used my car door to keep it steady (TIP!). If it's dark/there's low light, use something to stabilize your camera.

I think I also went to the exposure and adjusted. I think I underexposed it a bit (made it darker). Honestly I can't remember. To read more about exposure/overexposing/underexposing (i.e. exposure compensation), you may read THIS blog post.

Thursday, December 22, 2011

Wild times :)

After our first trip to the zoo with Theodore, we made a second. To Tanganika outside of Wichita.

The major differences were: 1) it wasn't 800 degrees outside. In fact, it was cold. 2) Far less exhibits. 3) Far less people. 4) We were closer to the animals, so I think kiddo got to see them a bit better.


Seriously, look at how close we were! I think it helped that it wasn't free day at the zoo. When we were there, throngs of children were pounding on the glass. If I were an animal on exhibit, I'd have gone on strike.


Theodore REALLY liked the kangaroos. The staff let us pet them; they were surprisingly soft. They don't look it, but almost as soft as a kitten.


Aaaaand, the bird house.

PHOTO TIP: This is shot with my point and shoot. We were under a shade, but the birds were in a bright area. Because I wanted to have light on Robin + T, I forced my flash to go off. This means the people in the front have light on them, and I can still see things in the light background.

This tip would be handy in this sort of instance. but also in front of something like a bright window. If you are photographing someone who is standing in front of a bright window and not forcing the flash to go off, they will be all dark and you will see perfectly out of the window. Just be careful about the glare of the flash on a window. You might want to stand at an angle.


Evidently someone forgot to feed the birds that morning. When we walked in, the birds swarmed. I honestly thought Theodore would freak out, but he was a really good sport!

PHOTO TIP: Again, the flash was forced in the above photo. Look at it compared to the one below. You're able to see us a bit better b/c of the flash.


They liked Robin. Despite her avian name, she didn't love them back as much.

Tuesday, November 15, 2011

Future hot rod?


Hold on to your estrogen, ladies! There's going to be plenty of testosterone (read: car stuff) in this post. There are a few photo tips/notes hidden in here, though.

My father-in-law restores classic cars, and over Labor Day, Theodore checked them out.


(no flash here).


{I forced my camera to flash here ... if you have glass, don't take a flash photo straight-on ... stand a bit off to an angle).


Friday, July 22, 2011

Swim time! :) pt. 2

OOOOK. As Robin wrote on her blog, we had company over the weekend. Good times were had by all.

I have some photos + videos to share. Actually, I'll break them into 2 posts. Sound good?

First the videos, because they're super cute :)


I think at the point we have kids, I'll want a video camera or something with video that has a higher quality than my little camera has. But for now this is OK (love you, Theo! Not a reflection on my affection, I promise!)


He's got a toofer coming in .... so of course he liked gnawing on the noodle. Pssst, kid, that isn't ours!


I kept switching back and forth from the "automatic" setting on the camera (the 2 above), which used a flash, to the "manual" setting w/o a flash (below). With a flash, kids are more prone to know you're taking their picture. Sans flash, you're more likely to capture them "just being kids" .... but in a low light situation, it's not always a pretty end photo. Sigh, what to do?


Unfortunately, the lifeguards at the Y here in town won't let us go down the big slide together :( but we'll just have to go back to the big city for that!

We "bobbed" and went under water. He did fairly well with that. And even better this time at floating on his back with some assistance (side note: my first job was as a lifeguard, teaching swim lessons. Probably one of my most favorite jobs. Ever.)


I've never seen such wrinkled feet after the pool. (TIP: used macro feature on camera to get this).


After bath time.


:)

Wednesday, June 22, 2011

Colorado 2011 — teaser


Erik and I spent 5 days in Colorado with my parents + brother, celebrating my 'rents' 35th wedding anniversary.

Just a quick peek .... if I'm a good girl and get my editing done for bizzzness, there will be more personal photos to share here. :)

There will also be some more photo tips shared .... but for those of you who can tell me .... what did I do on my point and shoot camera to avoid Erik and I's face being pitch black from the brims of our hats?

Monday, January 24, 2011

Losing my touch? / PHOTO TIP

Hi blog world! I'M ALIVE!!! I promise!

Big baby shower this weekend. Lots of catching up to do here.

I squeezed in a visit to my biz-partenr-in-crime. This is how it went:


Usually Erik has this effect on children, not me. I hope I'm not losing my touch! You can see my appearance on Mike's photo a day project of Nate HERE.

And for those of you who think I might undertake such a project when we have kids, THINK AGAIN!!!! I'm learning from Mike's zeal that it's a lot to bite off and chew.

PHOTO TIP for you mommies out there: notice how Mike took this photo. He's at eye level with his kiddo. With kids, they're lots shorter than we are. Often times in order to get the best photo of them, you gotta get down to their eye level.

Tuesday, September 28, 2010

Photo tip #4


Sometimes, you're at a place where the flash wants to fire. And sometimes it SHOULD fire. But these stations had plexiglass on the front of them .... so if I stand straight on and use the flash, there will be a glare.

What to do?

Today's photo tip: If you're using a flash with a reflective surface, stand a bit off to the side, so when your flash fires, you won't get the crazy glare and see the light reflected back at you in the mirror/shiny surface.

Friday, August 6, 2010

Photo tips: Why I'm doing this

Ok troopers. I'm getting some nice feedback on the photo tips. And I appreciate knowing they're helpful.

PSA: This post won't contain a tip, per se. Just a bit of explaining. So don't get your hopes up.

The reason I started doing these tips was just to help people get to know their point and shoot camera a bit better. I've had friends say to me "I need a better camera" when in fact their camera was perfectly functional, they just needed to learn how to use what they have.

There are others who have spent more time explaining f/stops (which is the same thing as aperture, Michelle) and shutter speeds. I don't believe I can control those on my point and shoot camera, so I'm not going to go into it here. Sorry to disappoint.

In fact, another photo friend of mine has recently commented that she's getting "swamped" with questions from people who get a nice camera, then basically want her to teach them how to use it. I'll be frank: I don't have that kind of time to explain to everyone how to use their camera.

But, I am willing to point you in the direction of resources. You can check out some great tips HERE. I admit I'm a *little* uncomfortable posting this because she basically encourages everyone to become a photographer. I'm afraid this will eventually put me out of a job because the mommies with a camera will eventually see no need for me. :(


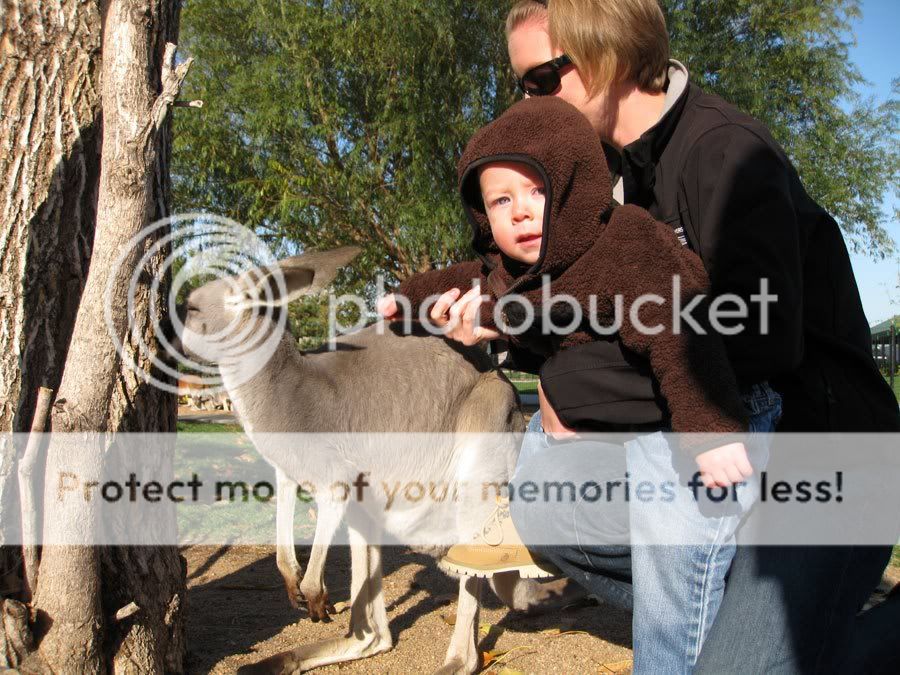
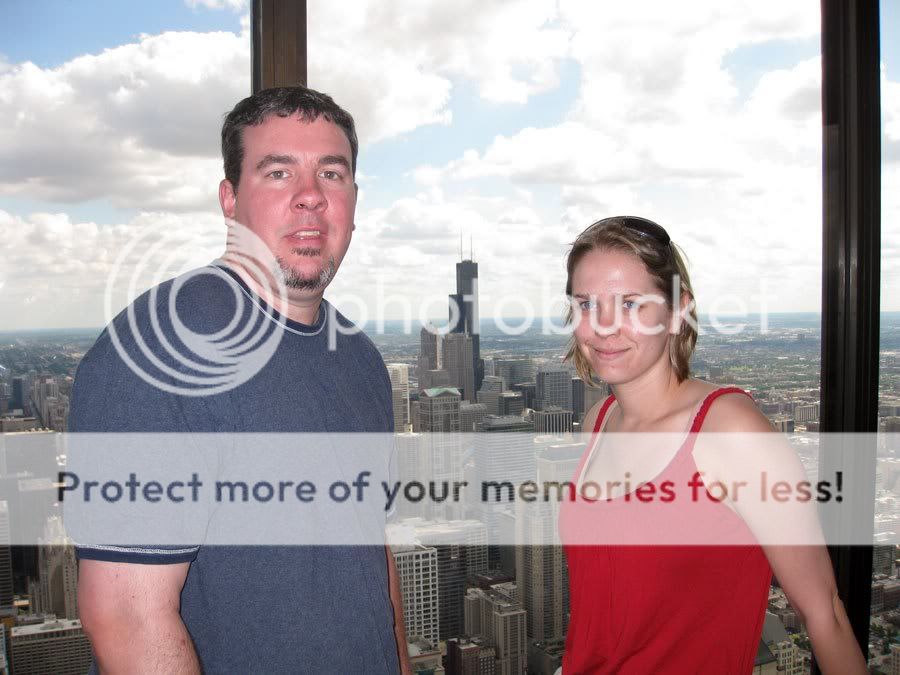
But there are good tips. And many of the photos she shows are made with professional quality lenses. As in the lens costs between $400-$1,500 (prices for lenses with f/2.8, f/1.4 or f/1.2). Basically, a lower "f-stop" means the background will be more blurry/out of focus and make the subject of the photo "pop out" more (see above photo).

But if you want to learn how to better photograph your kids, there are some really great photo tips like this. And if you have a SLR (camera where you can remove the lens and attach other lenses), you might want to ask for something from here for your birthday, Christmas or Mother's Day. If you only want to get one, I'd suggest "beyond the green box" which basically refers to the green box which means the camera will do all of the thinking and selecting for you.

I will end by saying just because someone has a flashy camera does NOT make them a good photographer. Being a good photographer is about the "eye" and the "vision." Honestly, some people are what I call "visual people" and others are not. And that's OK.

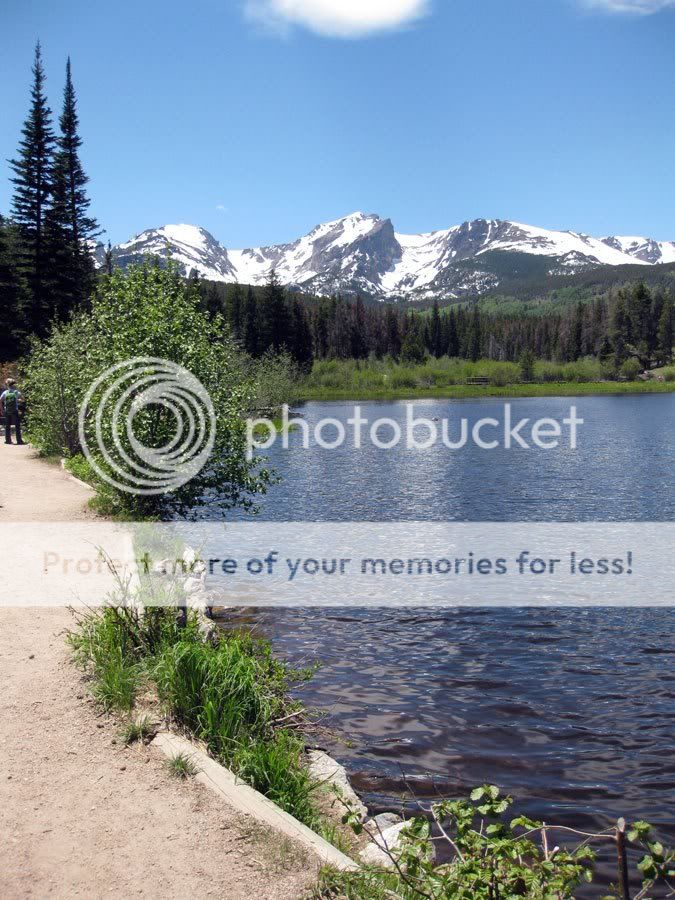
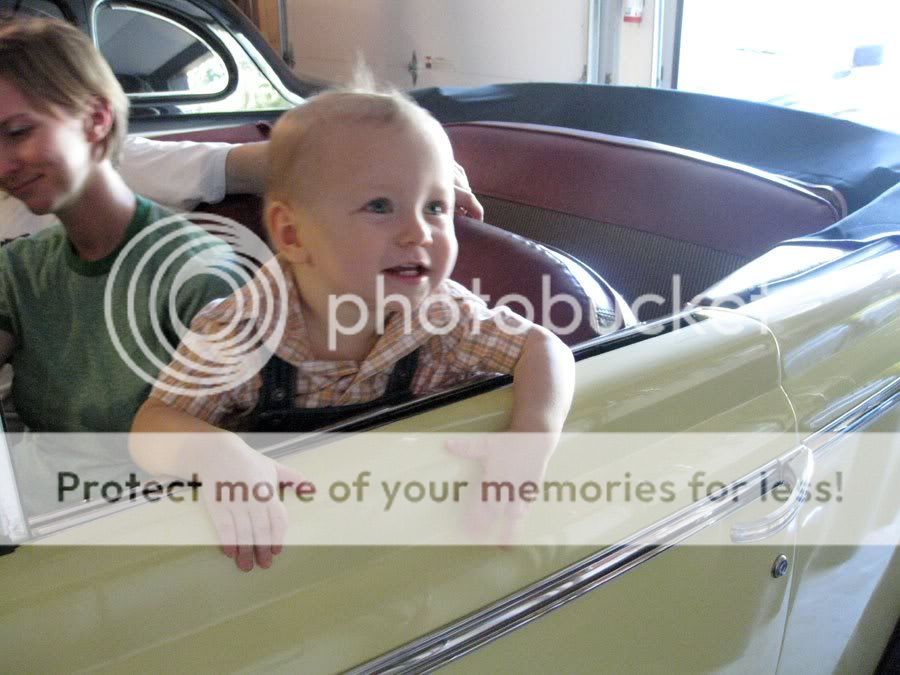
What I AM saying, though, is a visual person doesn't necessarily need to break the bank to make fantastic images. In fact, the image below was made with my little point and shoot camera:


I will also say that even if you have a great eye, I would still encourage you to think about having professional photos taken every year or so. This is because if YOU are the one taking the photos, you will be conspicuously absent from them. And, if you don't want to drop more than $400 on a really good lens, take at least half of that and invest it into quality family portraits.

Oh, and one last comment, PLEASE DO NOT TEACH YOUR KIDS TO SAY CHEESE!!!!!!!!!! Because 1) they end up making a bit of a strange face and look like they're gritting their teeth at you when they smile (I promise they do, just look at little 5 year old boys who smile. They look pained). and because 2) it's annoying. I was once photographing a family with 5 little kids. The "cheeeeeese" chorus was like fingernails on a blackboard. So JUST SAY NO TO CHEESE!!!!!! Seriously. Please. I beg of you.

Tuesday, August 3, 2010

Washington, D.C. 2010 — pt. 3 (Photo tip #3)

When I was in Arlington National Cemetery, there was a great example of something for a photo tip: the headstones.

The photo on the left is the way my camera wanted to take it: dark. That is because the camera saw the light sky and thought "there's plenty of light" ... not so. I wanted the grave stones to have light on them.


So I went into the MANUAL mode and made it "overexpose" about 1 stop (+1). That means I was allowing more light in than the camera thought I needed.


I went 1 step further, though. I overexposed it 2 stops (+2) so that I could more clearly see the writing on the stones. On the right photo, there's very little detail in the sky, but there wasn't a lot in the first one, so I am OK with that.

Another way to get light onto the object in the front of my picture (also called the foreground) would be to force the flash as in Tip #1. But the gravestones were pretty far away, and my flash wouldn't go that far, so this was a better option.

Does this make sense? Is this something you guys want/care to read on here? Yes? No? Too technical?

Sunday, July 25, 2010

Photo tip #2

From time to time, someone will e-mail me, asking for help with their camera/photography.

My biggest response to people is: READ YOUR MANUAL!!!!! Seriously. We were on our way back from Chicago, and I saw a woman reading a camera manual, and I went up and told her what a smart move it was! Yes, I'm nuts.

But a lot of photos I share here are from my point and shoot, so there are a few tricks.

Tip 1: Force Flash (scroll down to the bottom of the post)

Here's my second one: The MACRO function.


This is from our trip to Chicago. Often you'll see a setting that's a flower (looks like a tulip). It is meant to take pictures UP CLOSE AND PERSONAL!!!!

This is a great tip, because sometimes you want to get close to something, but the photo looks blurry. Maybe baby's fingers or toes? Well, turn on your Macro function, then get CLOSE! Like less than a foot away close. The trick with this, though, is that if your flash goes off, it will "blow everything out" or make your photo look all white. So be sure to turn your flash off.

Tuesday, July 20, 2010

Chicago 2010 — pt. 7 (Photo tip #1)


Just a nice, graphical photo. I like it.


A different take.


We went up in the Hancock building to view the Sears Tower. :)


Erik looking goofy.


Me looking goofy.

Sheesh.

Oh, and here's a tip for you camera geeks out there. This was all taken with my point and shoot. We watched someone else try to get a photo of them with the skyline in the background, and they couldn't do it. They were all dark/black, and the skyline looked great.

Here's why: The camera's meter saw the sky and said "There's enough light here" so it thought there was no need for a flash.

Many cameras have the option to force your flash to fire. What that did was put light on me and Erik, and still show the stuff in the background. It's not the same as a pro camera, but does a better job than letting your camera do all of the thinking!

This tip also applies to SUNSETS. If you want the sun to look great behind you,but also be able to see you, force your flash to go.

Example below: