About a week ago, I made
THIS post about gardening.
It's taken awhile (sorry!), but now I am taking the time to put words to the promise of blogging about composting. :)
But before I start, let me say that Erik and I have about 1 to 1.5 bags of trash that we put into the collection bin PER WEEK. I don't know how much your garbage out put is, but I'm pretty proud of that. We attain that by recycling everything possible (and we recently received a SECOND recycling bin from the city so we can put out even MORE recycling!!!), along with composting.
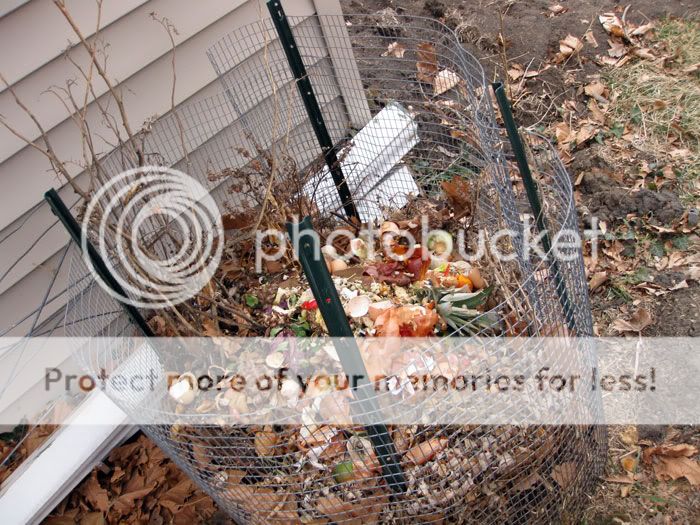
So, first things first, here is a photo of our compost pile:

(There are some dirt piles behind the pile, but the area inside of the wire inclosure is our compost pile).
There are certainly more elaborate setups, but this home-made setup works for us.
I simply went to Lowe's and purchased the 4 metal pole thingies, and the wire mesh stuff. I don't know the exact name of it. But I guess even chicken wire would work.
I hooked the wire stuff around the metal poles, but did make sort of a "door" that I can open it if I need to.
So, how do you start? Well, it's not terribly difficult. Seriously, VERY little actual SKILL is involved!
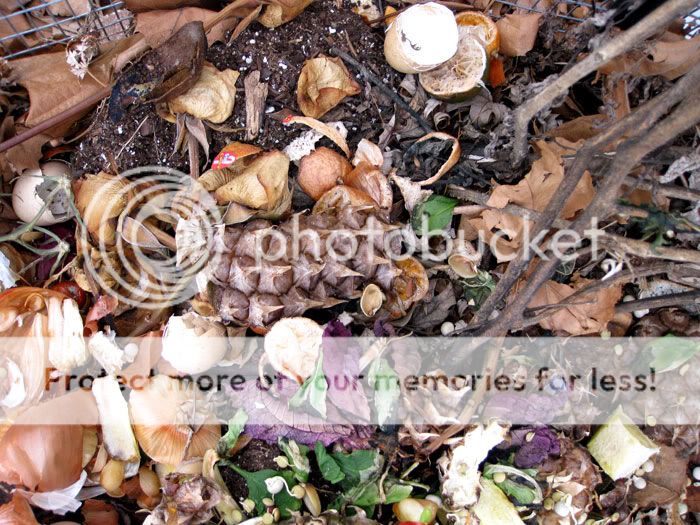
You take items you don't eat, or maybe they've gone bad, and toss it on the pile.
THAT'S IT!!! :)
Ok, so what do you add on to the pile? Fruit and veggie scraps.
It could include:
• apple core
• bananna peel
• the outer portion of the corn
• the center of the tomato
• the core of a pepper
• ends of an onion.
• garlic peel
• egg shells
• plants I've pulled from the garden at the end of the summer
Also .... GRASS CLIPPINGS!!!!! AND LEAVES. The first year, I didn't have leaves in the pile, just the grass clippings and the food scraps. It was a pretty smelly pile (my neighbor across the fence wasn't appreciative of the pile's placement). I did some reading, and realized we needed some "brown" in the pile ... so on the leaves went! (the neighbor is less objective to the pile now).
Really, lots of stuff. If we have lettuce that sits around too long, we toss it onto the pile.
Oh, I also put some peat into it when I started.
During the summer, I have my pitchfork and turn the pile about once a week. It's also important to be sure the pile gets some moisture. If it doesn't rain for a month or so, wet the pile down, because it will help to break down the pile.
Also, I will say that I have sort of a "backup pile." This is for when I've decided it's time to put the compost into the garden. Now, HOW do I know it's ready? Well, when you're turning the pile regularly, you'll notice that the pile sort of starts to look like dark, dark, dark dirt. Once I start to see that, I don't keep piling new stuff in because I want the compost to "finish" so to speak. I pile stuff onto a smaller area, and once the compost looks like rich dirt, I remove it and put it into the garden. Then I move the stuff from the "backup" site into the regular compost pile.

And this is what we use as transport. I learned this idea over the summer from the people Paul lived with. They had a nice stainless steel container WITH A LID. Previously, we'd just been using a big yogurt container with a lid. It would get gross and icky ... but with the stainless steel container, we can give it a really good thorough cleaning.
Oh, one last thought before I pull some photos of compost piles/devices I pulled from the web: It's important to have some slats or some way air can flow through/into your pile. I wouldn't suggest just sticking it into a trash can or something that is completely enclosed.
Ok, some photos of other ways of doing this I pulled from the web:

I really like the next two:


PLEASE don't feel like you have to spend a lot of money on one like this:

(but you can if you *really* want to).